Water damage is the number one killer of RVs, and it's not close. A roof leak that goes unnoticed for 6 months can destroy $5,000 to $15,000 worth of structure. I've seen travel trailers with rotted-through subfloors, delaminated walls, and mold growing behind cabinets, all from a crack in the roof sealant that would've cost $20 to fix if caught early.
In Martin County, the problem is amplified by three factors: year-round humidity, intense UV radiation that degrades sealants faster, and a hurricane season that tests every seam on your RV from June through November. If you're keeping an RV in Florida, water damage prevention isn't optional. It's the single most important maintenance task you can do.
Where Water Gets In: The 7 Most Common Entry Points
Water doesn't just come through one spot. It finds every weakness in your RV's exterior envelope. Here are the places that fail most often, ranked by how frequently we see them in our Martin County repairs.
1. Roof Sealant Around Vents and Skylights
This is the number one source of RV water intrusion, and it's not even close. Every vent, skylight, antenna base, and AC unit on your roof is sealed with a flexible sealant. In Florida's UV environment, that sealant dries out, shrinks, and cracks in as little as 12 to 18 months. Up north, the same sealant might last 3 to 5 years. Here, it doesn't get that luxury.
The fix is straightforward: inspect the roof sealant every 3 months and touch up any cracks immediately. We use Dicor self-leveling lap sealant for horizontal seams and non-sag Dicor for vertical surfaces. It's about $12 per tube. Keep two in your RV at all times.
2. Window and Door Seals
The rubber gaskets around your windows and entry door compress over time and lose their seal. Water runs down the exterior wall, finds a gap, and wicks into the wall cavity. You won't see it until the interior wall panel starts bubbling or discoloring, and by then, the framing behind it may be soft.
3. Slideout Seals
Slideout wiper seals take a beating. They're compressed every time the slide goes in and out, exposed to UV and rain, and they dry out and crack with age. When the top seal fails, water runs straight down the interior wall. We see this constantly in Martin County, especially on rigs with multiple slides.
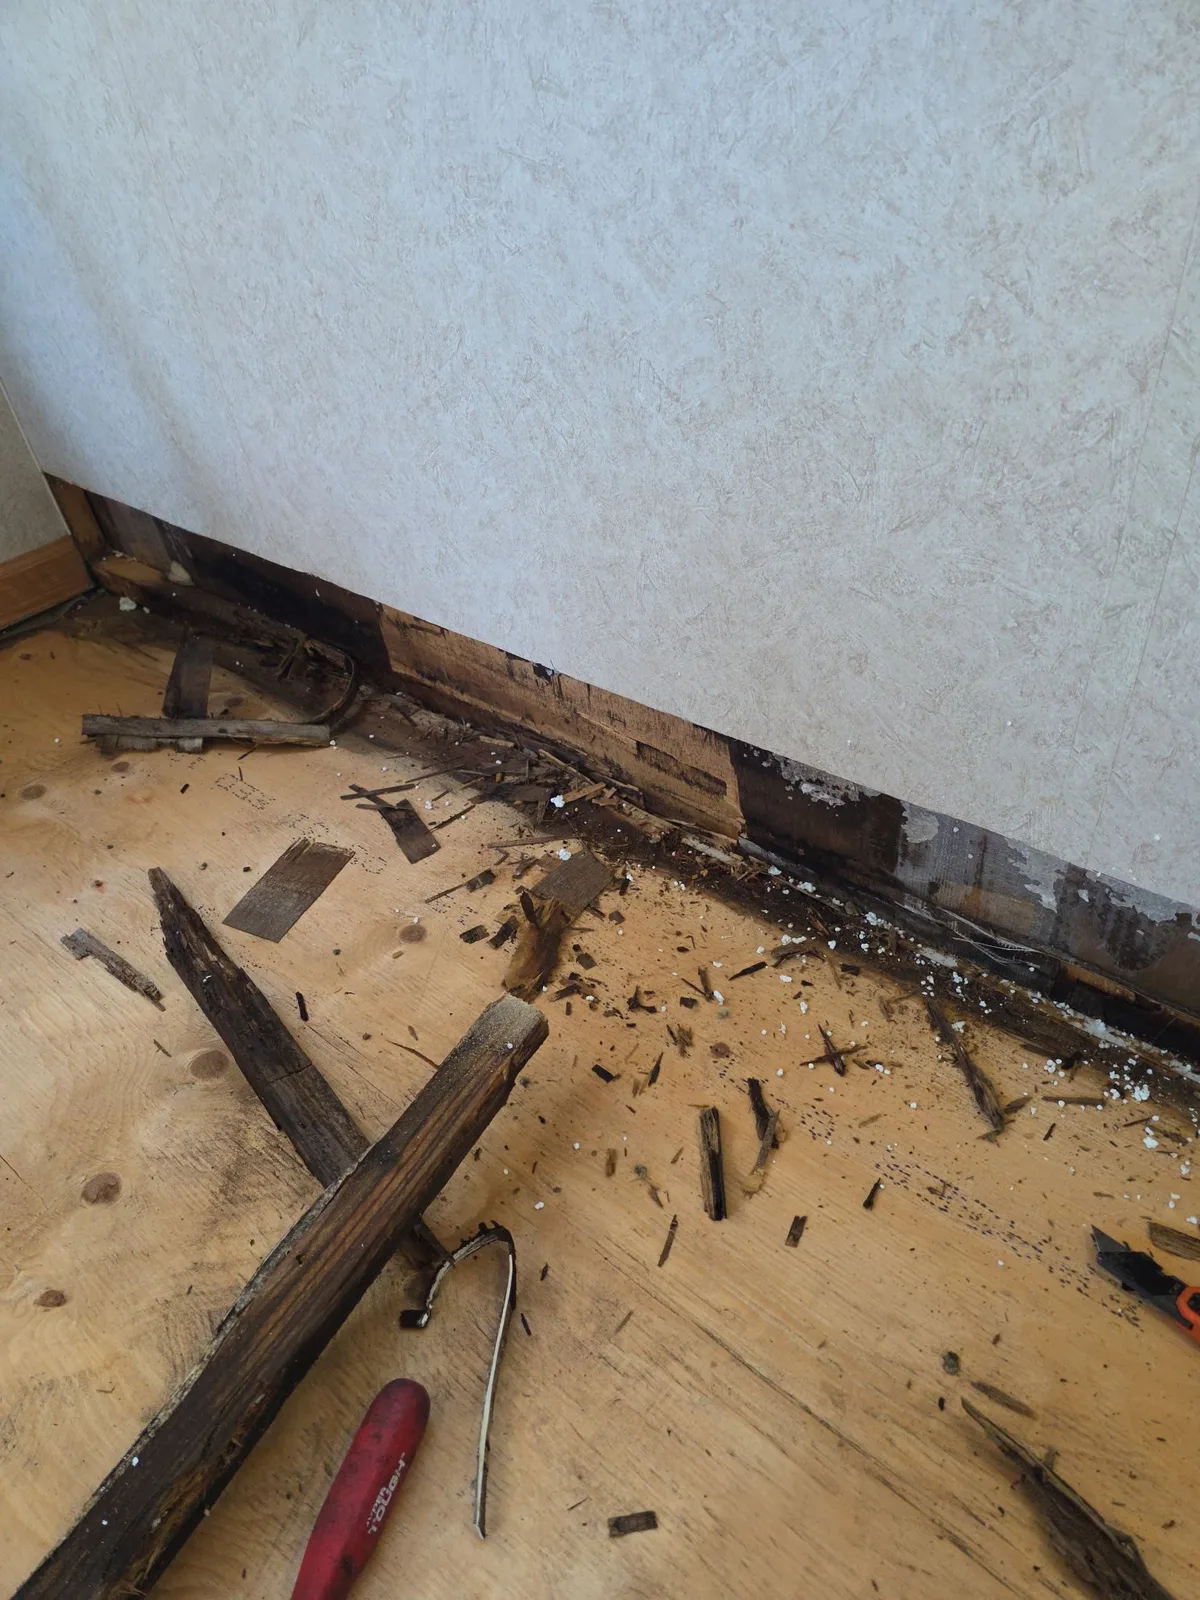
4. Plumbing Connections Under the Floor
A slow drip from a PEX fitting or a cracked water line under the bathroom can saturate the subfloor for months before you notice a soft spot. These leaks are especially destructive because they attack the floor from below, and Florida's humidity prevents the wood from drying out naturally.
5. AC Unit Condensate Drains
We covered this in the AC maintenance guide, but it's worth repeating. A clogged condensate drain can dump gallons of water into your ceiling cavity over a single week of heavy AC use. In Martin County's humidity, your AC produces significantly more condensate than in drier climates.
6. Roof Edge and Side Wall Joints
Where the roof meets the sidewall is a stress point. As the RV flexes during travel, the sealant at this joint cracks. Manufacturers apply a thick bead during assembly, but it's not permanent. Road vibration, thermal expansion, and UV exposure all work to break that seal.
7. Exterior Compartment Doors
The gaskets on basement storage compartments dry out and fail just like window seals. Water from a heavy rain pools in the storage bay and wicks up into the floor structure. It's often overlooked because people don't associate storage compartments with interior water damage.

How to Inspect Your RV for Water Damage
A proper inspection takes about 45 minutes and should happen every 3 months if you're keeping an RV in Florida. Here's the process I use and recommend to every customer.
Exterior Inspection
- Roof walk-through. Walk every inch of the roof (carefully). Look for cracked, peeling, or missing sealant around every penetration. Press on the roof surface itself. Any soft or spongy areas mean water has already penetrated the decking.
- Window and door frames. Run your finger along every seal. Look for gaps, cracks, or areas where the sealant has pulled away from the frame.
- Sidewall surfaces. Look for bubbling, delamination, or discoloration on fiberglass sidewalls. Press firmly on the wall surface near the bottom corners. Soft spots indicate trapped moisture.
- Compartment gaskets. Open every exterior compartment and check the door gaskets for cracking or compression. Look for water stains inside the compartment.
Interior Inspection
- Ceiling panels. Look for any discoloration, soft spots, or bowing. Pay special attention around vents, skylights, and AC units.
- Walls near windows. Press the wall panel below every window. Any softness means water is getting in.
- Floor under bathrooms and kitchens. Walk slowly and feel for any give or sponginess. These areas have the most plumbing connections and are the most vulnerable to slow leaks.
- Behind furniture. Move beds, couches, and dinette cushions periodically. Water damage loves to hide behind things you never move. According to EPA mold prevention guidelines, hidden moisture sources are the primary cause of mold growth in enclosed spaces.
- Smell test. A musty or earthy smell anywhere inside the RV is a red flag. Mold can grow within 24 to 48 hours of water intrusion in Florida's climate.
The Moisture Meter Advantage
A pin-type moisture meter costs $25 to $40 and gives you objective readings that your eyes and nose can't. Anything over 15% moisture content in wood is cause for concern. Over 20% means active water intrusion. I test every suspect area with a meter, and it's caught dozens of leaks that weren't visible yet. Worth every penny.
The Real Cost of RV Water Damage Repair
Here's what we charge for water damage-related repairs. These numbers are specific to Martin County and current as of March 2026.
- Roof sealant touch-up (spot repair): $75 to $200 depending on how many areas need attention.
- Full roof reseal (all seams and penetrations): $400 to $800 depending on RV length and condition.
- Full roof recoat (rubber roof): $1,500 to $3,500 depending on size and coating system.
- Window reseal (per window): $75 to $150.
- Slideout seal replacement: $200 to $600 per slide depending on seal type and accessibility.
- Subfloor section replacement: $800 to $2,500 depending on area and complexity.
- Full floor replacement: $3,500 to $8,000+ depending on RV size and damage extent.
- Wall delamination repair: $500 to $3,000 per wall section.
- Mold remediation: $500 to $2,000+ depending on how far it's spread.
Look at those numbers. A $75 roof sealant touch-up prevents a $3,000 floor replacement. That's a 40:1 return on a small investment of time and materials. There's no better maintenance math in the RV world.
Seasonal Prevention Schedule for Martin County
Here's the annual schedule I recommend for any RV owner living in or regularly visiting Martin County.
- January: Full interior and exterior inspection. Start the year knowing your RV's condition.
- April: Roof sealant check and touch-up. Before the rainy season starts.
- June: Pre-hurricane prep. Check all seals, clear gutters and drains, inspect slideout seals.
- September: Post-hurricane season inspection. Check for any damage from summer storms.
- November: Reseal any areas showing wear before snowbird season. Verify all plumbing connections under the floor.
If you're storing your RV and not living in it full-time, cover it with a breathable RV cover to reduce UV exposure on the roof sealant. But still inspect it quarterly. Covers reduce damage; they don't eliminate it.
When to Call Us
Prevention is a DIY job. Repair is where we come in. If you've found soft spots, visible mold, ceiling stains, or floor damage, call us at 772-271-5270 before it gets worse. We'll assess the full extent of the damage, give you an honest quote, and handle the repair from start to finish. The longer water damage sits, the more expensive it gets. Every week of delay makes the problem bigger.